Adding Touch Screens to Projects and Prototypes
Adding Touch Screens to Projects and Prototypes, available at $19.99, has an average rating of 5, with 72 lectures, 2 quizzes, based on 1 reviews, and has 21 subscribers.
You will learn about Adding a touch screen to a project on a developet board Sending and receiving data from and to the screen using UART Using the General Purpose Input Output (GPIO) pins of the screen as Input, Output, and PWM. Creating a custom animated gouge (animated battery level indicator) Receiving data to screen by creating a battery level indicator using the ADC of the development board and UART communications Sending UART data from the screen to the dev. board and from Dev board to a MIDI shield The screen used in this board is from Nextion, and the Dev board is Nucleo-64 from ST Microelectronics with 411RE microcontroller This course is ideal for individuals who are Makers who want to learn hwo to add touch screen to recevie and send data and istructions or Engineers who want to add a touch screen to their or Engineering students who want to create touch screen cotrol panels attached to their projects or Anyoen prototyping and interested in adding screen It is particularly useful for Makers who want to learn hwo to add touch screen to recevie and send data and istructions or Engineers who want to add a touch screen to their or Engineering students who want to create touch screen cotrol panels attached to their projects or Anyoen prototyping and interested in adding screen.
Enroll now: Adding Touch Screens to Projects and Prototypes
Summary
Title: Adding Touch Screens to Projects and Prototypes
Price: $19.99
Average Rating: 5
Number of Lectures: 72
Number of Quizzes: 2
Number of Published Lectures: 72
Number of Published Quizzes: 2
Number of Curriculum Items: 77
Number of Published Curriculum Objects: 77
Original Price: $22.99
Quality Status: approved
Status: Live
What You Will Learn
- Adding a touch screen to a project on a developet board
- Sending and receiving data from and to the screen using UART
- Using the General Purpose Input Output (GPIO) pins of the screen as Input, Output, and PWM.
- Creating a custom animated gouge (animated battery level indicator)
- Receiving data to screen by creating a battery level indicator using the ADC of the development board and UART communications
- Sending UART data from the screen to the dev. board and from Dev board to a MIDI shield
- The screen used in this board is from Nextion, and the Dev board is Nucleo-64 from ST Microelectronics with 411RE microcontroller
Who Should Attend
- Makers who want to learn hwo to add touch screen to recevie and send data and istructions
- Engineers who want to add a touch screen to their
- Engineering students who want to create touch screen cotrol panels attached to their projects
- Anyoen prototyping and interested in adding screen
Target Audiences
- Makers who want to learn hwo to add touch screen to recevie and send data and istructions
- Engineers who want to add a touch screen to their
- Engineering students who want to create touch screen cotrol panels attached to their projects
- Anyoen prototyping and interested in adding screen
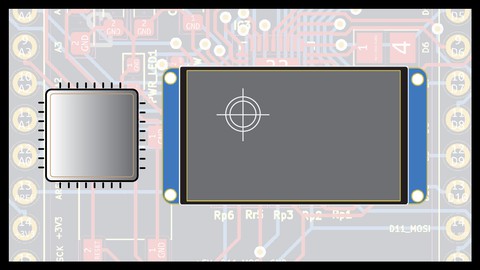
In this course you are going to learn how to interface a Nextion touch screen with projects done on a development board, the ST Nucleo-64 with 411 RE chip. Your board does not have to be the same, you can implement what you learn on the board of your choice, so watch, get the concept, and enjoy adding a touch screen to your project!
The main objective is to teach you how to utilize the resources of the touch screen in your project, starting from using the GPIOs of the screen assembly as Input, Output and PMW, and then how to communicate with the developemtn board through UART. Receiving and Transmitting.
Learning will be through real projects, starting from working with GPIOs as Output ( controlling an LED) , Input (Check the power on the pins), and PWM (controlling an RGB LED using sliders on the screen) modes. Then we are going to create an animated gauge simulating a battery level. Next, we are going to use that gauge in creating a battery level indicator using the Nucleo-64 board ADC. Last we are going to send UART instructions and data in two channels to a MIDI Shield, this project is for your learning objective and you do not have to implement it physically.
Whether you are an engineering student, an engineer, a maker, an electronics enthusiast, or anyone interested in this subject, this course is for you
I hope you enjoy the course!
Course Curriculum
Chapter 1: Introduction
Lecture 1: Introduction to the course
Lecture 2: Course plan
Chapter 2: Hardware and Software in use
Lecture 1: The touch screen we use in the course – Part 1
Lecture 2: The touch screen we use in the course – Part 2
Lecture 3: The development board we use int eh course – Part 1
Lecture 4: The development board we use int eh course – Part 2
Lecture 5: The TTL to USB module we use in the course – Part 1
Lecture 6: The TTL to USB module we use in the course – Part 2
Lecture 7: The Nextion IO adaptor we use in the course – Part 1
Lecture 8: The Nextion IO adaptor we use in the course – Part 2
Lecture 9: Bezel for the screen
Lecture 10: Downloading and installing Nextion Editor
Lecture 11: Explaning Nextion Editor interface – Part 1
Lecture 12: Explaning Nextion Editor interface – Part 2
Lecture 13: Explaning Nextion Editor interface – Part 3
Lecture 14: Adding and using fonts
Lecture 15: Changing attributes of a text box with a touch
Lecture 16: Scrolling text box
Lecture 17: Number box
Lecture 18: Using buttons
Lecture 19: Using Dual State buttons and Timers
Lecture 20: Receiving data on the screen
Lecture 21: Sending data from the screen
Lecture 22: A bit more about the NExtion Editor interface
Chapter 3: Using the GPIO of the Screen
Lecture 1: GPIOs of the Screen
Lecture 2: GPIOs as Output – Diagram and configurations
Lecture 3: Controling an LED from screen – Setting up the project in Nextion Editor
Lecture 4: Testing the LED project
Lecture 5: GPIOs as input
Lecture 6: GPIO as Pulse Width Modulation PWM
Lecture 7: Implementing the project in Nextion Editor – Part 1
Lecture 8: Implementing the project in Nextion Editor – Part 2
Lecture 9: Testing the Project – GPIO as PWM
Chapter 4: Creating a custom animated guage
Lecture 1: Creating an animated guage – plan and graphics
Lecture 2: Creating the animated guage – Part 1
Lecture 3: Creating the animated guage – Part 2
Lecture 4: Creating the animated guage – Part 3
Lecture 5: Testing the project
Lecture 6: Graphics types
Lecture 7: Design software and graphics sources
Chapter 5: Receiving UART data on the screen – Creating a battery level tester
Lecture 1: Project oerview
Lecture 2: Project layout and plan
Lecture 3: Creating Page 1 in Nextion Editor
Lecture 4: Creating Page 2 in Nextion Editor
Lecture 5: Creating Page 3 in Nextion Editor
Lecture 6: Sending the project to the screen
Lecture 7: Explaining what to change on screen when we read the battery value
Lecture 8: Explaining the change and the code plan
Lecture 9: Code plan – Part 1
Lecture 10: Code plan – Part 2
Lecture 11: Code plan – Part 3
Lecture 12: Code plan – Part 4
Lecture 13: Setting up the project in CubeIDE – Part 1
Lecture 14: Setting up the project in CubeIDE – Part 2
Lecture 15: Setting up the project in CubeIDE – Part 3
Lecture 16: Solving and understanding ADC reading
Lecture 17: ADC reading from the battery and the battery ranges
Lecture 18: ADC reading table
Lecture 19: Implementing the function in the code
Lecture 20: Connecting UART 6 on the Nucleo board
Lecture 21: Including the battery reading in the code
Lecture 22: Final code debugging and testing
Chapter 6: Sending UART Data from screen – MIDI Controller project
Lecture 1: Introduction to the project
Lecture 2: The hardware used in the project
Lecture 3: MIDI Protocol
Lecture 4: Debugging the project in Nextion Editor
Lecture 5: Explaining the project in Nextion Editor
Lecture 6: Seeting the project in CubeIDE and solving the assignement
Lecture 7: Understanding the system and the code plan for the project
Lecture 8: Explaning the MIDI instructions on the code
Lecture 9: Testing the project
Lecture 10: Testing the project with a logic analyzer
Instructors
-
Wissam Botros, P.Eng, CID
P.Eng – PMP – Application Engineer
Rating Distribution
- 1 stars: 0 votes
- 2 stars: 0 votes
- 3 stars: 0 votes
- 4 stars: 0 votes
- 5 stars: 1 votes
Frequently Asked Questions
How long do I have access to the course materials?
You can view and review the lecture materials indefinitely, like an on-demand channel.
Can I take my courses with me wherever I go?
Definitely! If you have an internet connection, courses on Udemy are available on any device at any time. If you don’t have an internet connection, some instructors also let their students download course lectures. That’s up to the instructor though, so make sure you get on their good side!
You may also like
- Top 10 Video Editing Courses to Learn in November 2024
- Top 10 Music Production Courses to Learn in November 2024
- Top 10 Animation Courses to Learn in November 2024
- Top 10 Digital Illustration Courses to Learn in November 2024
- Top 10 Renewable Energy Courses to Learn in November 2024
- Top 10 Sustainable Living Courses to Learn in November 2024
- Top 10 Ethical AI Courses to Learn in November 2024
- Top 10 Cybersecurity Fundamentals Courses to Learn in November 2024
- Top 10 Smart Home Technology Courses to Learn in November 2024
- Top 10 Holistic Health Courses to Learn in November 2024
- Top 10 Nutrition And Diet Planning Courses to Learn in November 2024
- Top 10 Yoga Instruction Courses to Learn in November 2024
- Top 10 Stress Management Courses to Learn in November 2024
- Top 10 Mindfulness Meditation Courses to Learn in November 2024
- Top 10 Life Coaching Courses to Learn in November 2024
- Top 10 Career Development Courses to Learn in November 2024
- Top 10 Relationship Building Courses to Learn in November 2024
- Top 10 Parenting Skills Courses to Learn in November 2024
- Top 10 Home Improvement Courses to Learn in November 2024
- Top 10 Gardening Courses to Learn in November 2024


