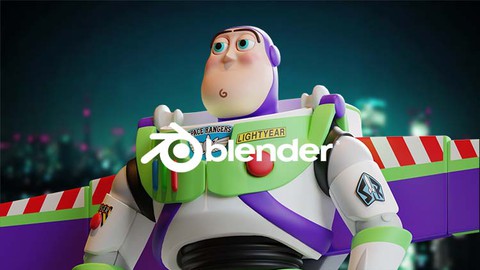
Modeling Buzz Lightyear from "Toy Story" with Blender !
Modeling Buzz Lightyear from "Toy Story" with Blender !, available at $54.99, has an average rating of 3.63, with 16 lectures, based on 4 reviews, and has 30 subscribers.
You will learn about 3D Character Workflow in Blender Creating Projects for Portfolio Time-Saving Tips and Techniques that can speed up your workflow Creating Disney Characters from Start to Finish Modeling Materials Rendering And Much More! This course is ideal for individuals who are Anyone who want to boost their skills in creating characters It is particularly useful for Anyone who want to boost their skills in creating characters.
Enroll now: Modeling Buzz Lightyear from "Toy Story" with Blender !
Summary
Title: Modeling Buzz Lightyear from "Toy Story" with Blender !
Price: $54.99
Average Rating: 3.63
Number of Lectures: 16
Number of Published Lectures: 16
Number of Curriculum Items: 16
Number of Published Curriculum Objects: 16
Original Price: $49.99
Quality Status: approved
Status: Live
What You Will Learn
- 3D Character Workflow in Blender
- Creating Projects for Portfolio
- Time-Saving Tips and Techniques that can speed up your workflow
- Creating Disney Characters from Start to Finish
- Modeling
- Materials
- Rendering
- And Much More!
Who Should Attend
- Anyone who want to boost their skills in creating characters
Target Audiences
- Anyone who want to boost their skills in creating characters
Hello guys, it’s Zerina here. Welcome to a new Blender course.
Recently, I re-watched the Toy Story series again, and I was impressed with the movie quality that Pixar and Disney did back then. They needed a big team to create only one character; they worked for weeks, even months.
So I made the course to show you that in the next three to four hours, you will be able to achieve what they did back then, and you will do it yourself, thanks to Blender! I will help you understand and learn the concept of 3d, tools for modeling, and to model one of your favorite characters from the Toy Story!
We will create the famous Buzz Lightyear. He is one of the main characters in this film. And he is the main character in the upcoming science fiction adventure film produced by Pixar animation studios and Walt Disney Pictures called Lightyear.
Course Preview:
I will start modeling by inserting the REFERENCEthat I provided for you. Once I insert the photos, I will be able to begin modeling. Buzz Lightyear has many details, so I will divide the modeling into several parts.
In the first part, we will model the head, and the face to better view the other pieces. Modeling will not be complicated because I will use all the basics of modeling. In addition, I will use all the basic modifiers, and I will show you how to use them properly.
When I finish modeling the head, I will start with the circle or the base for the helmet, and we will also begin modeling the upper part of the torso, which is attached to the area with the helmet.
After I finish modeling the upper part of the torso, I will focus on the lower part that binds the arms and the part attached to the pelvis.
When we finish modeling the torso, we will continue modeling the bottom part of the body, which is the pelvis, thigh, and the whole leg.
I will also make details on the legs in the form of long vertical lines on both sides of the legs and one horizontal line on the thigh.
Using the same modeling principles, I will continue modeling the arms and hands, and also, we will add the same vertical lines on the arms as we did to the legs.
When I finish modeling the arms and hands, I will model the backpack and the wings to finalize the character.
Once I finish modeling, I will add the materials; I am going to be applying all basic materials, so this part is going to be easy.
After I applied the materials, the final step was to add the stickers to the character. Once the stickers are done, I will now be focusing on the final render settings, such as adjusting the camera, adding the light or HDRI in my case, playing with the color management, and changing our render engine to cycles.
By enrolling in this course you will also get :
-
30 Days Money-Back Guarantee
When you enroll in the course, you are fully protected by our 100% Satisfaction Guarantee.If, for whatever reason, you’re the rare student NOTmaking significant strides towards achieving results, let us know within 30 days, and we will return every dime of your investment.
This means you can try out the academy RISK-FREE,and you can cancel your subscription at any time.
-
World-Class Support
We know better than anyone how learning Blender can be when you don’t have somebody to ask for help. That’s why at our academy you will benefit from our world-class support.
Anything that is not clear or you stumbled upon a problem following the course, and you don’t know how to solve it, you can ask a question on the platform directly below the video where you encountered the problem.
We personally review and answer all your questions, and our response time is 24 hours maximum, often responding in a couple of hours and sometimes even minutes. Please note this response time is during work days.
So what are we waiting for, guys? First, let’s hop on to the videos!
TO INFINITY AND BEYOND!
Course Curriculum
Chapter 1: Introduction
Lecture 1: Course Introduction
Lecture 2: Importing the Reference Images and Modeling the Head
Lecture 3: Modeling the Face Features
Lecture 4: Creating the Top Half of the Body
Lecture 5: Creating the Torso
Lecture 6: Creating the Bottom Part of the Body
Lecture 7: Creating the Legs
Lecture 8: Modeling the Feet
Lecture 9: Modeling the Arms
Lecture 10: Modeling the Hands
Lecture 11: Modeling The Back Pack
Lecture 12: Modeling the Wings
Lecture 13: Applying the Materials
Lecture 14: Applying the Stickers to the Body
Lecture 15: Adjusting the Final Render Settings
Lecture 16: Exercise
Instructors
-
Render Craft
3D MODELING AND ANIMATION ACADEMY
Rating Distribution
- 1 stars: 0 votes
- 2 stars: 0 votes
- 3 stars: 3 votes
- 4 stars: 1 votes
- 5 stars: 0 votes
Frequently Asked Questions
How long do I have access to the course materials?
You can view and review the lecture materials indefinitely, like an on-demand channel.
Can I take my courses with me wherever I go?
Definitely! If you have an internet connection, courses on Udemy are available on any device at any time. If you don’t have an internet connection, some instructors also let their students download course lectures. That’s up to the instructor though, so make sure you get on their good side!
You may also like
- Top 10 Video Editing Courses to Learn in November 2024
- Top 10 Music Production Courses to Learn in November 2024
- Top 10 Animation Courses to Learn in November 2024
- Top 10 Digital Illustration Courses to Learn in November 2024
- Top 10 Renewable Energy Courses to Learn in November 2024
- Top 10 Sustainable Living Courses to Learn in November 2024
- Top 10 Ethical AI Courses to Learn in November 2024
- Top 10 Cybersecurity Fundamentals Courses to Learn in November 2024
- Top 10 Smart Home Technology Courses to Learn in November 2024
- Top 10 Holistic Health Courses to Learn in November 2024
- Top 10 Nutrition And Diet Planning Courses to Learn in November 2024
- Top 10 Yoga Instruction Courses to Learn in November 2024
- Top 10 Stress Management Courses to Learn in November 2024
- Top 10 Mindfulness Meditation Courses to Learn in November 2024
- Top 10 Life Coaching Courses to Learn in November 2024
- Top 10 Career Development Courses to Learn in November 2024
- Top 10 Relationship Building Courses to Learn in November 2024
- Top 10 Parenting Skills Courses to Learn in November 2024
- Top 10 Home Improvement Courses to Learn in November 2024
- Top 10 Gardening Courses to Learn in November 2024


