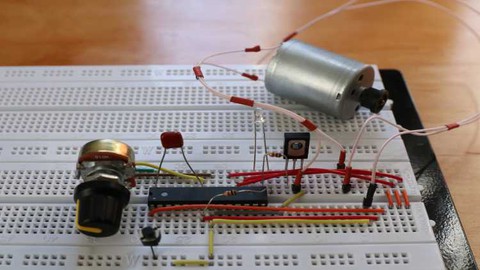
AVR microcontrollers: C language, electronic devices.
AVR microcontrollers: C language, electronic devices., available at $49.99, has an average rating of 3.8, with 115 lectures, based on 64 reviews, and has 4544 subscribers.
You will learn about Microcontrollers AVR: I/O pins, PWM, ADC, EEPROM, timers, etc. Microcontroller structure and Programming Introduction C Programming Basics, C language for AVR. Business projects using AVR microcontroller LEDs and Pushbuttons LCD Screens and Seven Segment Displays Motor and Keypad. Analog to Digital Conversion Timers and Counters Wireless devices controlled by AVR This course is ideal for individuals who are Beginner embedded systems developers or Anyone with a curiosity for making electronics or People with no experience in electronics or Children over 12 years old It is particularly useful for Beginner embedded systems developers or Anyone with a curiosity for making electronics or People with no experience in electronics or Children over 12 years old.
Enroll now: AVR microcontrollers: C language, electronic devices.
Summary
Title: AVR microcontrollers: C language, electronic devices.
Price: $49.99
Average Rating: 3.8
Number of Lectures: 115
Number of Published Lectures: 115
Number of Curriculum Items: 115
Number of Published Curriculum Objects: 115
Original Price: $54.99
Quality Status: approved
Status: Live
What You Will Learn
- Microcontrollers AVR: I/O pins, PWM, ADC, EEPROM, timers, etc.
- Microcontroller structure and Programming Introduction
- C Programming Basics, C language for AVR.
- Business projects using AVR microcontroller
- LEDs and Pushbuttons
- LCD Screens and Seven Segment Displays
- Motor and Keypad.
- Analog to Digital Conversion
- Timers and Counters
- Wireless devices controlled by AVR
Who Should Attend
- Beginner embedded systems developers
- Anyone with a curiosity for making electronics
- People with no experience in electronics
- Children over 12 years old
Target Audiences
- Beginner embedded systems developers
- Anyone with a curiosity for making electronics
- People with no experience in electronics
- Children over 12 years old
Attention! All earned funds will go to support the Ukrainian army in the fight against Russian invaders.
This course is for beginner and advanced electronics engineers who want to gain and increase experience in developing embedded systems on AVR microcontrollers. I think that AVR ATMEL microcontrollers are the most advanced 8-bit microcontrollers. All ARDUINO projects are built by using these microcontrollers. After completing the course, the student will receive the necessary knowledge about I/O ports, ADC, PWM, EEPROM, timers, interrupts. Much attention in this course will be paid to interfaces with external devices – sensors, wireless devices, real time clocks, external EEPROM, etc.. We will take a look the UART (USART) serial interface, SPI interface, TWI (two wire interface), the connection by 1-wire bus. The course will consider connections to the microcontroller of various devices – display devices (LED, 7-segment LED displays, LCD), matrix keyboards and so on. Students will get the experience of programming AVR microcontroller on C language. This course includes business projects also. Finished codes sources of this projects I will send students in private messages.The course shows complete programs and videos of working devices. Work projects will be included in this course also. This training course is constantly expanding. Feedback with students. Individual lessons and project support.
I kindly ask you to carefully read the curriculum and description of the course and do not make purchases with the aim of further refund. The course contains enough material in the public domain for you to appreciate the presentation style. Sorry, my english isn’t nice))
Course Curriculum
Chapter 1: Introduction
Lecture 1: Introduction
Chapter 2: C basics applied AVR microcontrollers
Lecture 1: Decimal, binary and HEX numbers in C language
Lecture 2: Functions in C language, related AVR microcontrollers
Lecture 3: Variable types, variable declaration.
Lecture 4: C language: Bitwise &, |, ^ (AND, inclusive OR, exclusive OR)
Lecture 5: C language: Bitwise <<, >>, ~ (shift left, shift right, one's complement)
Lecture 6: Arithmetic and relational operators.
Lecture 7: The statement if-else
Lecture 8: The statement switch-case
Lecture 9: Loops – while() and for()
Lecture 10: C program structure, #define, #include, main(), C preprocessor.
Lecture 11: Input/Output ports, DDRx, PORTx, PINx registers. Part 1.
Lecture 12: Input/Output ports, DDRx, PORTx, PINx registers. Part 2.
Lecture 13: First project: button, LED. Simplest program.
Lecture 14: Buttons and microcontroller – various use cases. The program samples.
Lecture 15: Electronic parts used in projects. Resistors, capacitors, LED, transistors.
Chapter 3: Developing for AVR microcontrollers
Lecture 1: Schematic diagram using a button, LED, electric motor, potentiometer
Lecture 2: ATMEL STUDIO, configuration of I/O registers
Lecture 3: Connection programmer to microcontroller, uploading HEX file.
Lecture 4: PWM in AVR microcontroller
Lecture 5: ADC in AVR microcontroller
Lecture 6: Displaying ADC result on one-digit LED display.
Lecture 7: Control speed of electric motor by AVR microcontroller
Lecture 8: Adjusting the brightness of the LED using a photoresistor. ADC and PWM.
Lecture 9: AVR microcontroller with button, LED, electric motor, potentiometer
Lecture 10: Analog comparator in AVR microcontroller. ACSR register.
Lecture 11: Overflow interrupt Timer1 Atmega8. Clock timer.
Lecture 12: Practical work with non-volatile memory EEPROM.
Lecture 13: Connecting membrane switch panel to AVR microcontroller
Lecture 14: External interrupts in AVR microcontroller.
Lecture 15: Connecting encoder to AVR microcontroller
Lecture 16: DC motor control. Part 1. Torque measuring.
Lecture 17: DC motor control. Part 2. Circuit diagram.
Lecture 18: DC motor control. Part 3. The program.
Lecture 19: DC motor control. Part 4. Final video.
Lecture 20: 1-Wire connection DS18B20 digital temperature sensor. Simplest thermometer.
Chapter 4: Displaying information on various displays using
Lecture 1: Introduction.
Lecture 2: Connection single LED
Lecture 3: Connection one-digit LED display. Part 1.
Lecture 4: Connection 1-digit LED display. Part 2. Increase/decrease the number by buttons.
Lecture 5: Connecting 2-digital 7-segment LED display to microcontroller AVR ATMEL
Lecture 6: Connecting 4-digital 7-segment display. Simplest clock.
Lecture 7: Connection 7-segment display using shift register by SPI.
Lecture 8: Connecting 16×2 LCD to AVR microcontroller Atmega8 by 8 wires.
Lecture 9: Connecting 16×2 LCD to AVR microcontroller Atmega8 by 4 wires.
Lecture 10: I2C library for connection 16×2 LCD display on C language.
Lecture 11: LCD graphic displays. Pins and memory description.
Lecture 12: Instruction table of LCD graphic display.
Lecture 13: LCD graphic display – control program – Part 1.
Chapter 5: SPI interface in AVR microcontrollers.
Lecture 1: Introduction
Lecture 2: Functional diagram of SPI, connection of two devices by SPI.
Lecture 3: 3-wires SPI interface, circuit diagram. Digital potentiometer connecting. Part 1
Lecture 4: The source code of 3-wires SPI interface, final video of ready device.
Chapter 6: USART (UART) interface in AVR microcontroller. Connection microcontroller and PC
Lecture 1: What is UART interface, function diagram, input – output pins, circuit diagram
Lecture 2: The program – UART registers, initialization, sending symbols.
Lecture 3: ASCII symbol table, 2-digit number sending by UART
Lecture 4: String sending from microcontroller to PC, data exchange between AVR and PC
Lecture 5: Data exchange between PC and AVR by UART. Sending the strings.
Chapter 7: Bluetooth module HC-05 to Android device connection using UART ATMEGA8
Lecture 1: How to connect Bluetooth module HC-05 to PC.
Lecture 2: Connection PC to smartphone using bluetooth module HC-05
Lecture 3: Connection microcontroller AVR to smartphone using Bluetooth module HC-05
Chapter 8: ATMEL AVR XMEGA microcontroller – connection the button, display. Interrupts.
Lecture 1: Introduction XMEGA microcontrollers.
Lecture 2: The I/O pins features, the register related I/O. DIR, DIRSET, DIRCLR, DIRTGL.
Lecture 3: Data Output Value registers: OUT, OUTSET, OUTCLR, OUTTGL.
Lecture 4: PORT Interrupt registers: INTCTRL, INTnMASK, INTFLAGS. REMAP register, PINnCTRL.
Lecture 5: First program – ON/OFF LED. Configuration DIR register.
Lecture 6: First program – ON/OFF LED. Configuration OUT register.
Lecture 7: Input pins. Connection the button. PINnCTRL register.
Lecture 8: Connection 7-segment 1-digit display. Part 1.
Lecture 9: Connection 7-segment 1-digit display. Part 2.
Lecture 10: Connection 7-segment 4-digit display to microcontroller
Lecture 11: Connection LCD character display 16×2. LCD library.
Lecture 12: Connection graphic LCD display. Part 1. What is graphic display?
Lecture 13: Connection graphic LCD display. Part 2. Instruction table description.
Lecture 14: Connection graphic LCD display. Part 3. The program. Control functions.
Lecture 15: Keypad connection. Displaying numbers received from the keypad.
Lecture 16: Port interrupts. Registers configuration, code example.
Chapter 9: Watering programmable machine for indoor plants
Lecture 1: Watering machine – circuit diagram.
Lecture 2: Watering machine – connection 7-segment display with microcontroller
Lecture 3: Description of buttons on watering machine
Lecture 4: Interrupt overflow handler. Formation of time intervals
Lecture 5: Information output on 7-segment display
Lecture 6: Non-volatile memory (EEPROM) in watering machine.
Lecture 7: Connection of peristaltic pump with watering machine
Lecture 8: Ready watering machine checking on breadboard
Chapter 10: Alarm clock on AVR microcontroller Atmega8.
Lecture 1: Introduction. Alarm clock.
Lecture 2: Circuit diagram of alarm clock.
Lecture 3: Connection 7-segment display with microcontroller. #define section
Lecture 4: Timer1 configuration, EEPROM, the main() function of program
Lecture 5: Displaying information. Overflow interrupt handler Timer1
Instructors
-

Oleksandr Aleshchenko
Electronic engineer
Rating Distribution
- 1 stars: 6 votes
- 2 stars: 1 votes
- 3 stars: 8 votes
- 4 stars: 17 votes
- 5 stars: 32 votes
Frequently Asked Questions
How long do I have access to the course materials?
You can view and review the lecture materials indefinitely, like an on-demand channel.
Can I take my courses with me wherever I go?
Definitely! If you have an internet connection, courses on Udemy are available on any device at any time. If you don’t have an internet connection, some instructors also let their students download course lectures. That’s up to the instructor though, so make sure you get on their good side!
You may also like
- Digital Marketing Foundation Course
- Google Shopping Ads Digital Marketing Course
- Multi Cloud Infrastructure for beginners
- Master Lead Generation: Grow Subscribers & Sales with Popups
- Complete Copywriting System : write to sell with ease
- Product Positioning Masterclass: Unlock Market Traction
- How to Promote Your Webinar and Get More Attendees?
- Digital Marketing Courses
- Create music with Artificial Intelligence in this new market
- Create CONVERTING UGC Content So Brands Will Pay You More
- Podcast: The top 8 ways to monetize by Podcasting
- TikTok Marketing Mastery: Learn to Grow & Go Viral
- Free Digital Marketing Basics Course in Hindi
- MailChimp Free Mailing Lists: MailChimp Email Marketing
- Automate Digital Marketing & Social Media with Generative AI
- Google Ads MasterClass – All Advanced Features
- Online Course Creator: Create & Sell Online Courses Today!
- Introduction to SEO – Basic Principles of SEO
- Affiliate Marketing For Beginners: Go From Novice To Pro
- Effective Website Planning Made Simple


