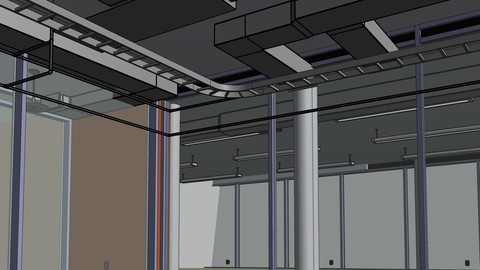
Learn Revit MEP (English)
Learn Revit MEP (English), available at $19.99, has an average rating of 3.45, with 122 lectures, 9 quizzes, based on 24 reviews, and has 151 subscribers.
You will learn about Working with the Autodesk Revit software’s basic viewing, drawing, and editing commands. Inserting and connecting MEP components and using the System Browser. Working with linked architectural files. Creating spaces and zones so that you can analyze heating and cooling loads. Creating HVAC networks with air terminals, mechanical equipment, ducts, and pipes. Working with Families Know about the Different Kinds of Families Creating plumbing networks with plumbing fixtures and pipes. Creating HVAC and plumbing systems with automatic duct and piping layouts. This course is ideal for individuals who are Mechanical Engineer or Designers or Students in mechanical engineering department or Beginner, Intermediate, and Advanced users will learn the MEP functions of Revit It is particularly useful for Mechanical Engineer or Designers or Students in mechanical engineering department or Beginner, Intermediate, and Advanced users will learn the MEP functions of Revit.
Enroll now: Learn Revit MEP (English)
Summary
Title: Learn Revit MEP (English)
Price: $19.99
Average Rating: 3.45
Number of Lectures: 122
Number of Quizzes: 9
Number of Published Lectures: 121
Number of Published Quizzes: 9
Number of Curriculum Items: 139
Number of Published Curriculum Objects: 138
Original Price: $39.99
Quality Status: approved
Status: Live
What You Will Learn
- Working with the Autodesk Revit software’s basic viewing, drawing, and editing commands.
- Inserting and connecting MEP components and using the System Browser.
- Working with linked architectural files.
- Creating spaces and zones so that you can analyze heating and cooling loads.
- Creating HVAC networks with air terminals, mechanical equipment, ducts, and pipes.
- Working with Families
- Know about the Different Kinds of Families
- Creating plumbing networks with plumbing fixtures and pipes.
- Creating HVAC and plumbing systems with automatic duct and piping layouts.
Who Should Attend
- Mechanical Engineer
- Designers
- Students in mechanical engineering department
- Beginner, Intermediate, and Advanced users will learn the MEP functions of Revit
Target Audiences
- Mechanical Engineer
- Designers
- Students in mechanical engineering department
- Beginner, Intermediate, and Advanced users will learn the MEP functions of Revit
Revit is a design and documentation platform that supports the design, drawings, and schedules required for building information modeling (BIM), and allows for coordination among all team members.
By the end of this course, you’ll be able to:
Know about Revit and BIM technology. Starting the software and recognize user interface. Control the saving reminder, assign default view discipline, apply color theme, customize the keyboard shortcuts, control the working of double-click mouse, and place the location of ready-made templates and library files. The safe and easy way to open the standalone file. Assign a starting view. Recognize project user interface.
Making relations between elements using Constraints. The difference between type properties and instance properties. Ways to select the various kinds of elements in a project. The function of TAB key. Create, save and modify a selection. How to control size of the element graphically.
Know about Basic Creation & Editing Tools. Creating a Revit project upon coordination type, the unit, and Discipline.
Adding project information. Linking a Revit model to a host model. The new addition in Revit 2017, Project base point option. Copy and Monitor levels to track any changes in model. Creating floor and ceiling plan views Creating new views using 3 types of duplicating options. Arranging files in project browser.
Create a mass for a conceptual design, then create a mass floor at each level defined in the project. Create an energy model, based on the Revit architectural model. Place rooms in the building model. Specify conceptual types for energy analysis. Specify the project location. Export the model with analytical volumes to a gbXML file. Place spaces in the areas of the building. Use the zone tool to define spaces that can be controlled by environmental control systems, such as heating, cooling, and humidity control systems. Select a service type from more than 20 options. Use the Building/Space Type Settings dialog to specify default building type settings, including operational hours. Specify material thermal properties of building elements for energy analysis. Generate the energy analysis. Send the energy model to the cloud for simulation and analysis. Perform a Heating and Cooling Loads Analysis and recognize the heating and cooling loads report.
Using the Mechanical Settings dialog to configure component sizes, and the behavior of the mechanical systems. Install the BIMobject® App for Revit toolbar, to download all families you need in a project. Place mechanical equipment and air terminals for a duct system in a project. The different kinds of air systems and how can we create them. Specify configuration of the duct. The different between duct placeholder and duct tools, and how to use both. Create view templates and how can we apply them. Create callout views. Recognize the duct placement tools. How can we draw ductwork manual and using the generate layout. Specify rise or/ drop symbols used for a duct system. Place duct accessories. The different kinds of hydronic systems and how can we create them. Routing the piping using the Pipe commands in Plumbing & Piping panel, or by using connector on mechanical equipment.
Using the Mechanical Settings dialog to define default parameters that are applied separately to the systems and piping. Preparing the views to represent a plumbing discipline. Copy and Monitor plumbing fixtures. Create size catalogs according to an applications you working on. Adding Room tags which can be displayed values for related parameters, such as room number, room name, computed area, and volume. Create and apply a color scheme to levels. Placing Plumbing fixtures using the 3 options: placed on a vertical face, face, and work plane. How it’s easy to fix an elevation component issue, by Creating a Reference Plane. Enter the flow pressure and minimum sizes of fixture water supply pipes, to estimate the flow rate. Check plumbing fixture’s elevations as the Code mentioned. Create Domestic and Sanitary Systems. Deal with pipe accessories. The way to change the layout, the material, or even the elements type in a plumbing project. Ways to speed up modeling your Plumbing design. How to slop your pipes using Offset Connections and Slopped Piping tools. Rout the (domestic & Sanitary) pipes. Inserting a data using Keynote tool.
A new chapter about how to deal with Sprinklers, place sprinklers, create a Fire Protection System, create a specific pipe for the fire protection system, Sprinklers Pipe Layouts, draw a supply riser.
Course Curriculum
Chapter 1: Introduction
Lecture 1: What is Revit?
Lecture 2: How to download resources?
Lecture 3: How to ask question?
Lecture 4: Autodesk Apps
Chapter 2: About Revit
Lecture 1: About Revit (article)
Lecture 2: Introduction
Lecture 3: User Interface (article)
Lecture 4: User Interface
Lecture 5: General Options (article)
Lecture 6: Options Dialog
Lecture 7: Open a standalone Revit file
Lecture 8: Starting View
Lecture 9: Project User Interface
Chapter 3: Elements
Lecture 1: Elements (article)
Lecture 2: Introduction of Elements
Lecture 3: Types of elements
Lecture 4: Apply Constraint with Dimensions
Lecture 5: Element Properties
Lecture 6: Select Elements in a Linked Model
Lecture 7: Select Pinned elements
Lecture 8: Select Elements by Face
Lecture 9: Select Elements Using a Filter
Lecture 10: Select All Instances
Lecture 11: Use Of The Tab Key
Lecture 12: Save Selection
Lecture 13: Create Filter-Based Selection
Lecture 14: Edit Selection
Lecture 15: Drag and Flip Controls (new)
Chapter 4: View
Lecture 1: The Navigation Bar
Lecture 2: The ViewCube (article)
Lecture 3: The ViewCube
Lecture 4: Section Box
Lecture 5: Scope Box
Chapter 5: Modify
Lecture 1: Introduction of Modify
Lecture 2: Move
Lecture 3: Copy
Lecture 4: Delete
Lecture 5: Trim
Lecture 6: Mirror
Chapter 6: Set up a project
Lecture 1: Set up a project – Introduction
Lecture 2: Create a new project (article)
Lecture 3: New Revit Project
Lecture 4: Create a project using no template
Lecture 5: Project Information
Lecture 6: Linking a Revit Model
Lecture 7: Link a model to another
Lecture 8: Project base point
Lecture 9: Copy and Monitor (Levels – Grids)
Lecture 10: Create Plans and Ceiling (article)
Lecture 11: Creating Initial Plan Views
Lecture 12: Duplicate Views
Chapter 7: Design Analysis
Lecture 1: Introduction of Design Analysis
Lecture 2: Introduction to Loads
Lecture 3: About Energy Analytical Model (new)
Lecture 4: Create a conceptual Massing Model
Lecture 5: Create a form using DWG file (new)
Lecture 6: Place a Mass Instance in a Project
Lecture 7: Create an In-Place Mass
Lecture 8: Adding Rooms (new)
Lecture 9: Construction Types
Lecture 10: Basic Energy Settings
Lecture 11: Exporting to gbXML (new)
Lecture 12: Assign a space (article)
Lecture 13: Place Spaces
Lecture 14: Space Tag
Lecture 15: Space Naming
Lecture 16: Creating Zones
Lecture 17: Zone Properties
Lecture 18: Service type
Lecture 19: Building Type
Lecture 20: Material Thermal Properties (new)
Lecture 21: Run Energy Simulation (new)
Lecture 22: Heating and Cooling Loads
Chapter 8: HVAC
Lecture 1: HVAC – Introduction
Lecture 2: Mechanical Settings for Duct
Lecture 3: Place Mechanical Equipment
Lecture 4: Air Terminals Distribution
Lecture 5: Create Air Systems
Lecture 6: Duct Sizing methods (article)
Lecture 7: Routing Preferences for Duct
Lecture 8: Duct PlaceHolder
Lecture 9: Callout Views
Instructors
-
Samaah Sultaan
Autodesk Educator Expert
Rating Distribution
- 1 stars: 0 votes
- 2 stars: 2 votes
- 3 stars: 9 votes
- 4 stars: 6 votes
- 5 stars: 7 votes
Frequently Asked Questions
How long do I have access to the course materials?
You can view and review the lecture materials indefinitely, like an on-demand channel.
Can I take my courses with me wherever I go?
Definitely! If you have an internet connection, courses on Udemy are available on any device at any time. If you don’t have an internet connection, some instructors also let their students download course lectures. That’s up to the instructor though, so make sure you get on their good side!
You may also like
- Top 10 Language Learning Courses to Learn in November 2024
- Top 10 Video Editing Courses to Learn in November 2024
- Top 10 Music Production Courses to Learn in November 2024
- Top 10 Animation Courses to Learn in November 2024
- Top 10 Digital Illustration Courses to Learn in November 2024
- Top 10 Renewable Energy Courses to Learn in November 2024
- Top 10 Sustainable Living Courses to Learn in November 2024
- Top 10 Ethical AI Courses to Learn in November 2024
- Top 10 Cybersecurity Fundamentals Courses to Learn in November 2024
- Top 10 Smart Home Technology Courses to Learn in November 2024
- Top 10 Holistic Health Courses to Learn in November 2024
- Top 10 Nutrition And Diet Planning Courses to Learn in November 2024
- Top 10 Yoga Instruction Courses to Learn in November 2024
- Top 10 Stress Management Courses to Learn in November 2024
- Top 10 Mindfulness Meditation Courses to Learn in November 2024
- Top 10 Life Coaching Courses to Learn in November 2024
- Top 10 Career Development Courses to Learn in November 2024
- Top 10 Relationship Building Courses to Learn in November 2024
- Top 10 Parenting Skills Courses to Learn in November 2024
- Top 10 Home Improvement Courses to Learn in November 2024


