
Revit Architecture – Fundamentals for beginners
Revit Architecture – Fundamentals for beginners, available at $19.99, has an average rating of 4.38, with 51 lectures, based on 4 reviews, and has 12 subscribers.
You will learn about How to start a revit project from scratch using a template and take a project from start to finish using Revit Understand the User Interface and be able to navigate a revit project and load families into your project All major components of revit required to build detailed models and documentation What BIM means, The fundamentals of Revit and the common terminology used in this software This course is ideal for individuals who are Architects, Designers, Engineers and Builders It is particularly useful for Architects, Designers, Engineers and Builders.
Enroll now: Revit Architecture – Fundamentals for beginners
Summary
Title: Revit Architecture – Fundamentals for beginners
Price: $19.99
Average Rating: 4.38
Number of Lectures: 51
Number of Published Lectures: 51
Number of Curriculum Items: 51
Number of Published Curriculum Objects: 51
Original Price: A$29.99
Quality Status: approved
Status: Live
What You Will Learn
- How to start a revit project from scratch using a template and take a project from start to finish using Revit
- Understand the User Interface and be able to navigate a revit project and load families into your project
- All major components of revit required to build detailed models and documentation
- What BIM means, The fundamentals of Revit and the common terminology used in this software
Who Should Attend
- Architects, Designers, Engineers and Builders
Target Audiences
- Architects, Designers, Engineers and Builders
Autodesk Revit – For the Beginners wanting to learn how to model and use revit from drawing production.
Course Content
I will guide you through the installation process, and make sure ensuring you have installed the software correctly and we will be using the metric library and templates. If you wish to use a different version that’s ok too. All the processes and how we use Revit will be the same no matter the region you are in.
You don’t need previous experience with Revit or CAD based softwares. By the end of the course, you’ll understand BIM (Building Information Management), parametric modelling and essential terminology used in the world of revit. You’ll also know how to navigate the User Interface and by the end you will be confident to start modelling your own projects in Revit.
We start with a blank exercise file.
Starting with a Blank project file we will then begin to build our project, introducing a new tools, techniques, and features as we move through the course. This includes:
– Adding in the datum elements, such as the levels and grids.
– Modelling elements including walls, windows, doors, floors, ceilings, curtain walls, and roofs.
– Loading families and placing casework, furniture, and plumbing fixtures
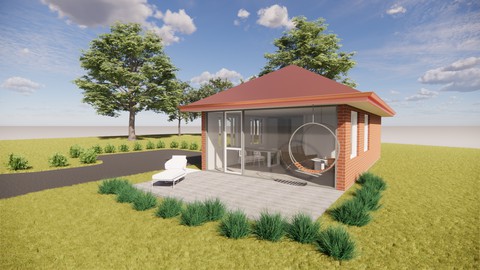
We will then leverage the 3D model we have created and create 2D details, annotating and tagging the detail, create schedules & legends, elevations and sections as well as render images.
To fish off we will then create sheets place views on these sheets and understand the entire workflow of modelling, drafting and sheet creation.
Alongside the videos, I have supplied you with exercise files to help you on your way.
I continually update this course as new features and workflows are released into Revit so you will always learn something new with this course.
I look forward to seeing you in class to develop your Revit skills
Course Curriculum
Chapter 1: Getting Started
Lecture 1: Introduction
Lecture 2: Building Information Management defined
Lecture 3: What is Parametric Modelling
Lecture 4: Essential Terminology
Lecture 5: Installing Revit
Chapter 2: Exploring the Revit User Interface
Lecture 1: The File Menu
Lecture 2: The Titlebar
Lecture 3: The Ribbon, Ribbon View state and Ribbon Tabs
Lecture 4: Contextual Tabs
Lecture 5: The Options Bar
Lecture 6: The Type Selector
Lecture 7: The Info Centre
Lecture 8: The Project Browser
Lecture 9: The Status Bar
Lecture 10: 3D View Cube and Steering Wheel
Lecture 11: Keyboard Shortcuts
Chapter 3: Starting a New Project and setting up Datum Elements
Lecture 1: Start a new Revit project using a project template
Lecture 2: Datum Elements – Set the Project Grids and Levels
Chapter 4: Developing the Building Shell
Lecture 1: Link a CAD drawing into Revit to use as an underlay
Lecture 2: Model the Exterior walls
Lecture 3: Define and use new wall types
Lecture 4: Model the Interior walls
Lecture 5: Load and place doors in the building model
Lecture 6: Load and place windows in the building model
Lecture 7: Add a floor to the building model
Lecture 8: Add a Roof to the building model
Lecture 9: Add a Fascia and Gutters to the building model
Lecture 10: Add a Soffit to the building model
Lecture 11: Add Ceilings to the building model
Chapter 5: Modelling the Interiors Furniture and Fittings
Lecture 1: Loading and placing interior furniture
Chapter 6: Model the site and surrounding context
Lecture 1: Link a CAD drawing into Revit to use as an underlay
Lecture 2: Creating a Topographical Surface
Lecture 3: Align the Model to True North
Lecture 4: Changing the Toposurface Surface Material
Lecture 5: Creating a Slab Edge
Lecture 6: Define Surface Materials and Add a Parking Component
Lecture 7: Define a Building Pad Path
Lecture 8: Load and Add Site Components to the Model
Lecture 9: Create a 3D camera view and materialise the model
Chapter 7: Creating sections, Elevation and details
Lecture 1: Cutting a Section View of the Building Model
Lecture 2: Create a Callout Detail of a Window
Lecture 3: Import 2D Detail Components
Lecture 4: Annotate the Detail with Text and Tags
Chapter 8: Prepare the drawings for issuing
Lecture 1: Placing Dimensions
Lecture 2: Create an Colour Fill Legend and Room Plan
Lecture 3: Generate a Tabular Door Schedule
Lecture 4: Creating a Door Schedule Using Legends
Lecture 5: Creating and setting up Drawing Sheets
Lecture 6: Modify the Title Sheet Information
Lecture 7: Layout Views on a New Title Sheet
Chapter 9: Conclusion
Lecture 1: Conclusion and next steps
Instructors
-

Jeames Hanley
Revit Elite User and Design Technology Leader
Rating Distribution
- 1 stars: 0 votes
- 2 stars: 0 votes
- 3 stars: 0 votes
- 4 stars: 4 votes
- 5 stars: 0 votes
Frequently Asked Questions
How long do I have access to the course materials?
You can view and review the lecture materials indefinitely, like an on-demand channel.
Can I take my courses with me wherever I go?
Definitely! If you have an internet connection, courses on Udemy are available on any device at any time. If you don’t have an internet connection, some instructors also let their students download course lectures. That’s up to the instructor though, so make sure you get on their good side!
- Storyboarding Techniques and Tips

- Google Sites for 2022

- Drawing Monsters with Adobe Illustrator CC

- Google Sites for 2022

- Revit Architecture – Fundamentals for beginners

- Revit Architecture – Fundamentals for beginners

- 5 Creative Woodworking Projects | Bumper DIY Course

- Learn UI UX Design Adobe XD : Learn User Experience Design

- Learn UI UX Design Adobe XD : Learn User Experience Design

- Autodesk Inventor 2020 Complete Beginners Course

- Love's Canvas – Illustrated Romance Book Cover Design

- Love's Canvas – Illustrated Romance Book Cover Design

- Geometry Nodes in Blender 4: Create Complex 3D Models
- Revit MEP Professional Design and Modeling Course

- Revit MEP Professional Design and Modeling Course

- Complete Blender beginner workflow for Cinematic art,step-by

- Adobe Photoshop CC: Essentials Photoshop Course Zero to Hero

- Master Canva: Create Graphic Design & Become a Canva Expert

- Master Canva: Create Graphic Design & Become a Canva Expert

- How to do AI artificial intelligence Art, and on Opensea