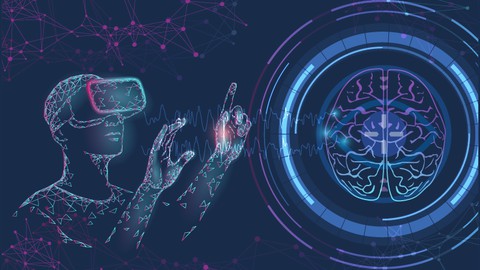
Build Complete VR App in Unity with Eye Tracking & EEG
Build Complete VR App in Unity with Eye Tracking & EEG, available at $69.99, has an average rating of 4.1, with 109 lectures, based on 50 reviews, and has 712 subscribers.
You will learn about Build VR App in Unity from scratch for research using C# programming language Integrate Eye Tracking, calibration processes and EEG Neurofeedback Save data in csv files from unity for research purposes including users demographics, questionnaire, Eye tracking and EEG Learn how to clean eye tracking data using python Learn how to convert eye tracker timestamps in unix timestamps for research using python Learn how to save data into online database with php programming language Learn Unity scene transitions in different ways, how to arrange and create more advance codes, how to backup project using Github and Github desktop This course is ideal for individuals who are This course is for anyone interested to create applications in Unity and save data for research purposes or People with no coding experience who want to create apps in Unity It is particularly useful for This course is for anyone interested to create applications in Unity and save data for research purposes or People with no coding experience who want to create apps in Unity.
Enroll now: Build Complete VR App in Unity with Eye Tracking & EEG
Summary
Title: Build Complete VR App in Unity with Eye Tracking & EEG
Price: $69.99
Average Rating: 4.1
Number of Lectures: 109
Number of Published Lectures: 109
Number of Curriculum Items: 109
Number of Published Curriculum Objects: 109
Original Price: £49.99
Quality Status: approved
Status: Live
What You Will Learn
- Build VR App in Unity from scratch for research using C# programming language
- Integrate Eye Tracking, calibration processes and EEG Neurofeedback
- Save data in csv files from unity for research purposes including users demographics, questionnaire, Eye tracking and EEG
- Learn how to clean eye tracking data using python
- Learn how to convert eye tracker timestamps in unix timestamps for research using python
- Learn how to save data into online database with php programming language
- Learn Unity scene transitions in different ways, how to arrange and create more advance codes, how to backup project using Github and Github desktop
Who Should Attend
- This course is for anyone interested to create applications in Unity and save data for research purposes
- People with no coding experience who want to create apps in Unity
Target Audiences
- This course is for anyone interested to create applications in Unity and save data for research purposes
- People with no coding experience who want to create apps in Unity
In this course, you will learn how to build in Unity a VR App, learn how to create interactions in VR, how to include shaders and effects and how to integrate Eye Tracking, EEG and Neurofeedback for your research project. You will learn many methods to transition between scenes, you will learn more advanced codes and methods in Unity to correctly write the scripts and you will also learn how to back up your project into the GitHub server using the GitHub desktop. After this course, you will be able to collect data in Unity into CSV files from users’ demographic information, from questionnaires, eye tracking and EEG. This course will also cover two additional programming languages including Python and PHP. We will use python to clean data collected from the eye tracker and PHP to connect Unity with an online server and post the data into our online database. From this course, you will be able to learn the fundamental codes that will help you develop your own app for your research study. No coding and knowledge experience in Unity is required and no technological devices are required to follow this course. The aim of this course is to help you learn how to best utilize Unity for your own research project.
Course Curriculum
Chapter 1: Introduction
Lecture 1: Introduction
Chapter 2: Installing, explaining Unity and setting up the scenes
Lecture 1: Downloading Unity Hub and Unity
Lecture 2: Explaining Unity Platform
Lecture 3: Creating The Scenes In Unity
Chapter 3: Downloading and Explaining UI Asset from Unity Asset Store
Lecture 1: Downloading and Explaining UI Asset Part 1
Lecture 2: Downloading and Explaining UI Asset Part 2
Chapter 4: Creating the User Form Scene For Users Demographics Information
Lecture 1: Creating The User Form
Lecture 2: Importing Fonts To Unity From The Web
Lecture 3: Adding The Fields To The Form
Lecture 4: Finalizing User Form Part 1
Lecture 5: Finalizing User Form Part 2
Chapter 5: Setting Up The Main Scene And Working on The Practice Trial
Lecture 1: Setting Up The Chemistry Lab Main Scene
Lecture 2: Setting Up Robot And Its Animation
Lecture 3: Setting Up The Practice Trial Part 1
Lecture 4: Setting Up The Practice Trial Part 2
Lecture 5: Setting Up The Practice Trial Part 3
Lecture 6: Setting Up Github Part 1
Lecture 7: Setting Up Github Part 2
Lecture 8: Addressing The Error For Large Files Github
Lecture 9: Addressing The Error For Large Files Github If Error Persists
Lecture 10: Practice Trial – Add Simple Code For Disabling The Button on Button Click
Lecture 11: Practice Trial – Add Code For Showing Models And Changing Text on Button Click
Lecture 12: Practice Trial – Add Code For Disabling Models After StartCoroutine Timer
Lecture 13: How We Can Add Comments In Script And Save
Chapter 6: VR Setup, Adding Interactions And Liquid Effects In Practice Trial
Lecture 1: Installing Steam and SteamVR
Lecture 2: Importing SteamVR in Unity
Lecture 3: Introduction of SteamVR Example In Unity
Lecture 4: Including VR Camera In Our Main Scene
Lecture 5: Including Our VR Camera With Pointer And Our Hands Model In Main Scene
Lecture 6: Changing The Color Of Pointer And VR Hands And Saving In Github Desktop
Lecture 7: Practice Trial – Interacting With Models In VR And Removing The Timer
Lecture 8: Practice Trial – Adding Liquid Effect And Pouring Liquid Into Bottle Part 1
Lecture 9: Practice Trial – Adding Liquid Effect And Pouring Liquid Into Bottle Part 2
Lecture 10: Practice Trial – Writing Script To Fill Liquid In Beaker On Collision Part 1
Lecture 11: Practice Trial Writing Script To Fill Liquid In Beaker On Collision Part 2
Lecture 12: Addressing The Error For The VR Pointer
Chapter 7: Building The Three Experiments For The Study Task With Effects and Liquid Shader
Lecture 1: Setting Up Models For The Study Experiment 1 Part 1
Lecture 2: Setting Up Models For The Study Experiment 1 Part 2
Lecture 3: Writing Script To Enable Experiment 1 On Condition
Lecture 4: Experiment 1 – Writing Script To Change Text And Make Model Interactable
Lecture 5: Experiment1 – Writing Script To Show Mini Potassium In Beaker On Collision
Lecture 6: Experiment 1 – Writing Script To Rotate Mini Potassium In Beaker On Collision
Lecture 7: Experiment 1 – Writing Script To Scale Down Mini Potassium In Beaker OnCollision
Lecture 8: Experiment 1 – Writing Script To Include Audio And Particles On Collision
Lecture 9: Writing Script To Finalize Experiment 1 And Start Experiment 2
Lecture 10: Experiment 2 – Setup
Lecture 11: Experiment 2 – Writing Script To Change Robot Instructions
Lecture 12: Experiment 2 – Adding Fluid And Making Brown Bottle Model Interactable
Lecture 13: Experiment 2 – Solution If Liquid Of Beaker Is Not Shown
Lecture 14: Experiment 2 – Writing Script To Make Aluminium Model Interactable
Lecture 15: Experiment 2 – Changing Chemistry Lab Script To Be In Order
Lecture 16: Experiment 2 Adding Mini Aluminium Into The Scene When Colliders Touch
Lecture 17: Experiment 2 – Showing Aluminium Effect And Changing Material And Color
Lecture 18: Experiment 3 – Setup
Lecture 19: Experiment 3 – Writing Script To Show Models When Experiment 2 Ends
Lecture 20: Experiment 3 – Adding First Interaction Nitromethane Into Plate
Lecture 21: Experiment 3 – Adding Second Interaction Methanol Into Plate
Lecture 22: Experiment 3 – Adding Third Interaction Flame Effect
Lecture 23: Experiment 3 – Writing Script To Complete Experiment
Chapter 8: Building Questionnaire And End Scene
Lecture 1: Setting Up Questionnaire Scene
Lecture 2: Setting Up Questions In Questionnaire Scene
Lecture 3: Adding Questions And Answers In Questionnaire Scene
Lecture 4: Completing Questionnaire Scene
Lecture 5: Completing End Scene
Chapter 9: Scene Transitioning And Setting Up Data Collection
Lecture 1: Disabling Pointer In Chemistry Lab And Changing Scenes First Method
Lecture 2: Changing Scenes Second Method
Lecture 3: Changing Scenes Third Best Method That We Will Use For This Project
Lecture 4: Making Button Interactable And Setting Up Data Collection For User Form
Lecture 5: Saving Demographics Data From User Form
Lecture 6: Using Next Scene Function In User Form
Chapter 10: Setting Up Eye Tracker, Calibration And Data Collection
Lecture 1: Explaining Pupil Labs Eye Tracker And Importing HMD Eyes EyeTracker In Unity
Lecture 2: Technical Explanation For Saving Data From Eye Tracker
Lecture 3: Creating Folder With Username And Date Depending On UserGroup
Lecture 4: Downloading Pupil Core Software And Adding Calibration In Chemistry Lab Scene
Lecture 5: Fixing Unity Net Version And Setting Up Calibration After Practice Trial
Lecture 6: Finalizing Calibration And Enabling Study After Calibration Has Completed
Lecture 7: Setting Up And Finalizing Recording Data From Eye Tracker
Lecture 8: Testing Recording Data From Eye Tracker
Lecture 9: Saving Data From Eye Tracker Where User Looked
Lecture 10: Testing Saving Data From Eye Tracker Where User Looked
Chapter 11: Setting Up EEG, Data Collection, Neurofeedback And Questionnaire
Lecture 1: Explaining EEG Downloading Software And Importing Looxid Link Unity SDK In Unity
Lecture 2: Importing Looxid Link From Course
Lecture 3: Adding EEG Visualizer Prefab Into Our Chemistry Lab Study
Lecture 4: Adding EEG Game Object And Writing Script To Record Data From EEG
Lecture 5: Adding Mind Indexes And Functions To Script To Record Data From EEG
Lecture 6: Adding Timestamps And Functions To Script To Record Data From EEG
Lecture 7: Adding Save Functions To Script To Record Data From EEG
Lecture 8: Fixing Script To Record Data From EEG
Lecture 9: Saving Raw EEG Data From EEG
Instructors
-
Fjorda Kazazi, PhD
Software Engineer
Rating Distribution
- 1 stars: 0 votes
- 2 stars: 0 votes
- 3 stars: 9 votes
- 4 stars: 15 votes
- 5 stars: 26 votes
Frequently Asked Questions
How long do I have access to the course materials?
You can view and review the lecture materials indefinitely, like an on-demand channel.
Can I take my courses with me wherever I go?
Definitely! If you have an internet connection, courses on Udemy are available on any device at any time. If you don’t have an internet connection, some instructors also let their students download course lectures. That’s up to the instructor though, so make sure you get on their good side!
You may also like
- Top 10 Language Learning Courses to Learn in November 2024
- Top 10 Video Editing Courses to Learn in November 2024
- Top 10 Music Production Courses to Learn in November 2024
- Top 10 Animation Courses to Learn in November 2024
- Top 10 Digital Illustration Courses to Learn in November 2024
- Top 10 Renewable Energy Courses to Learn in November 2024
- Top 10 Sustainable Living Courses to Learn in November 2024
- Top 10 Ethical AI Courses to Learn in November 2024
- Top 10 Cybersecurity Fundamentals Courses to Learn in November 2024
- Top 10 Smart Home Technology Courses to Learn in November 2024
- Top 10 Holistic Health Courses to Learn in November 2024
- Top 10 Nutrition And Diet Planning Courses to Learn in November 2024
- Top 10 Yoga Instruction Courses to Learn in November 2024
- Top 10 Stress Management Courses to Learn in November 2024
- Top 10 Mindfulness Meditation Courses to Learn in November 2024
- Top 10 Life Coaching Courses to Learn in November 2024
- Top 10 Career Development Courses to Learn in November 2024
- Top 10 Relationship Building Courses to Learn in November 2024
- Top 10 Parenting Skills Courses to Learn in November 2024
- Top 10 Home Improvement Courses to Learn in November 2024


