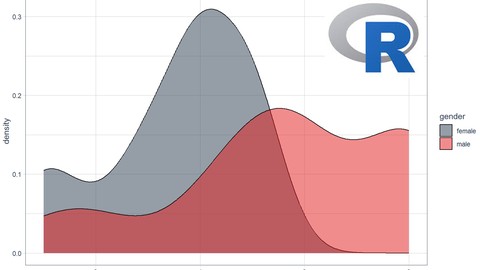
Nonprofit Data Analysis Using R
Nonprofit Data Analysis Using R, available at $174.99, with 69 lectures.
You will learn about Load data from different sources into R (files, databases) Clean and transform data using the tidyverse packages Quickly explore and visualize data trends Create professional visualizations and reports Perform time-series analysis Conduct feature engineering for deeper analysis Automate reports with Rmarkdown This course is ideal for individuals who are Non-profit employees responsible for measuring and understanding program performance. or Employees who work on spreadsheets and are looking for more capacity and efficiency. It is particularly useful for Non-profit employees responsible for measuring and understanding program performance. or Employees who work on spreadsheets and are looking for more capacity and efficiency.
Enroll now: Nonprofit Data Analysis Using R
Summary
Title: Nonprofit Data Analysis Using R
Price: $174.99
Number of Lectures: 69
Number of Published Lectures: 69
Number of Curriculum Items: 69
Number of Published Curriculum Objects: 69
Original Price: $174.99
Quality Status: approved
Status: Live
What You Will Learn
- Load data from different sources into R (files, databases)
- Clean and transform data using the tidyverse packages
- Quickly explore and visualize data trends
- Create professional visualizations and reports
- Perform time-series analysis
- Conduct feature engineering for deeper analysis
- Automate reports with Rmarkdown
Who Should Attend
- Non-profit employees responsible for measuring and understanding program performance.
- Employees who work on spreadsheets and are looking for more capacity and efficiency.
Target Audiences
- Non-profit employees responsible for measuring and understanding program performance.
- Employees who work on spreadsheets and are looking for more capacity and efficiency.
This is the R course for beginners with no coding experience. It is based on the latest research in online learning theory and my personal experience with dozens of online courses. I created this course as the course I wish I would have had when I first started learning R.
We will code together and focus on the 20% of code responsible for 80% of the work. At the end of sections, you will have a ‘Make It Stick’ challenge to apply what you have just learned with a different dataset (based on principles in the book ‘Make It Stick’).
This course is different from other beginner courses in R in a couple significant ways:
Project-based learning with real-world scenarios: All lessons are based on common questions facing data practioners.
Content focus: The course outline and lectures are based on everyday workflows of data practioners rather than a bottom-up approach to R programming. Practically, this means we won’t spend much time learning about R and core principles of programming; we will immediately start with how you will use it.
Current (& continually updated) code: I work in R everyday and make sure you are learning the best and most efficient ways to accomplish the most common and important tasks. For example, the rowwise function in the dplyr package enables you to perform calculations across columns by rows. A single line of code can now accomplish what was previously far more challenging.
Keeping it real: I keep the video rolling when I make an error. You can learn a lot from mistakes. R was my first programming language and I quit twice because of too many errors, too much time to learn it, and frustration with online courses that left out important steps or assumed knowledge that simply wasn’t there. I try really hard to explain what we’re doing while we’re doing it and then giving you an opportunity to do it on your own with a different (but related) dataset.
In this course, you will learn to:
-
Load data from different sources (files, databases)
-
Structure data for analysis using the tidyverse packages
-
Quickly explore and visualize data trends
-
Conduct feature engineering for deeper analysis
-
Analyze survey data
-
Select the right visualization for your data
-
Create professional visualizations
-
Create and automate reports using RMarkdown
Course Curriculum
Chapter 1: Introduction
Lecture 1: Dataset Introduction
Chapter 2: Project Set-Up
Lecture 1: Download R
Lecture 2: Download R Studio
Lecture 3: Download Course Files
Lecture 4: Set Working Directory
Lecture 5: Install Packages
Chapter 3: Section 1: Jumpstart
Lecture 1: 1.0. Load Libraries and Import Data
Lecture 2: 1.1. Data Wrangling Part 1 (mutate, change data types)
Lecture 3: 1.2. Data Wrangling Part 2 (select, set_names, rename, and separate)
Lecture 4: 1.3. Data Wrangling Part 3 (filter, group_by, and count)
Lecture 5: 1.4. Data Wrangling Part 4 (distinct, slice, and filter by another variable)
Lecture 6: 1.5. Data Visualization Part 1 (core syntax, facet_wrap, geom_text, & scales)
Lecture 7: 1.6. Data Visualization Part 2 (Add theme and labels)
Lecture 8: 1.7. Data Visualization Part 3 (geom_point, geom_smooth, geom_jitter)
Lecture 9: Challenge 1 Introduction
Lecture 10: Challenge 1 Explanation
Chapter 4: Section 2: Loading, Joining, and Exploring Data
Lecture 1: Section 2 Introduction
Lecture 2: Data Type Intro.
Lecture 3: Data Structure Intro.
Lecture 4: Load Data from Snowflake Database
Lecture 5: Mutate (with case_when, if_else)
Lecture 6: Exploratory Data Analysis Part 1 (Introduction)
Lecture 7: Exploratory Data Analysis Part 2 (DataExplorer package)
Lecture 8: Exploratory Data Analysis Part 3 (skimr and GGally packages)
Chapter 5: Section 3: Data Transformation
Lecture 1: Filter Part 1
Lecture 2: Filter Part 2
Lecture 3: Pivot_wider and pivot_longer Part 1
Lecture 4: Pivot_longer Part 2
Lecture 5: Bind_rows
Lecture 6: Group_by & Summarize
Lecture 7: Dates and Times Part 1: Date components
Lecture 8: Dates and Times Part 2: floor & ceiling_date
Lecture 9: Dates and Times Part 3: lag & change over time
Lecture 10: Dates and Times Part 4: rollmean & cumsum
Lecture 11: Modify Strings Part 1: str_to_lower, str_detect, and str_replace_all
Lecture 12: Modify Strings Part 2: str_glue
Lecture 13: Modify Strings Part 3: separate & unite
Lecture 14: Challenge 3 Introduction
Lecture 15: Challenge 3 Solutions
Chapter 6: Section 4: Feature Engineering
Lecture 1: Feature Engineering Introduction
Lecture 2: Cumulative (year-to-date) and Rolling Averages
Lecture 3: Extracting Time-Based Features
Lecture 4: Course Option: Functions or Visualizations
Lecture 5: Functional Programming Part 1: Anonymous functions within a list
Lecture 6: Functional Programming Part 2: Creating your first function
Lecture 7: Interpreting a Boxplot and Defining Outliers
Lecture 8: Functional Programming Part 3: Run a Function on a Single Column
Lecture 9: Functional Programming Part 4: Run a Function On Multiple Columns
Lecture 10: Functional Programming Part 4: Adding Function Results to Visualization
Lecture 11: Functional Programming Part 5: Run Multiple T-Tests on a Dataframe
Lecture 12: Functional Programming Part 6: Save and Load Functions
Chapter 7: Section 5: Data Visualizations and Reports
Lecture 1: Introduction: Choosing the Right Plot
Lecture 2: Part 1: Barplot
Lecture 3: Part 2: Barplot Function
Lecture 4: Part 3: Scatterplots (& geom_jitter)
Lecture 5: Part 4: Scatterplot Function
Lecture 6: Part 5: Density Plot
Lecture 7: Part 6: Boxplot & Violin Plot
Lecture 8: Part 7: Line Graph and Sourcing Plot Functions
Lecture 9: Part 8: Load New Libraries Before Next Section
Chapter 8: Section 6: Building Reports
Lecture 1: R Markdown Introduction
Lecture 2: Part 1: Creating a Report
Lecture 3: Part 2: Adding Graphs and Tables to Reports
Lecture 4: Part 3: Using CSS to Customize Report Layout
Lecture 5: Part 4: PDF Reports
Lecture 6: Part 5: Intro to Graph Layout with Patchwork
Lecture 7: Part 6: Additional Ways to Customize Graph Layout
Lecture 8: Part 7: Visual Editor Window
Lecture 9: Part 8: Parameterized Reports for Automation
Instructors
-
Wesley Furlong
Ph.D., Data Scientist
Rating Distribution
- 1 stars: 0 votes
- 2 stars: 0 votes
- 3 stars: 0 votes
- 4 stars: 0 votes
- 5 stars: 0 votes
Frequently Asked Questions
How long do I have access to the course materials?
You can view and review the lecture materials indefinitely, like an on-demand channel.
Can I take my courses with me wherever I go?
Definitely! If you have an internet connection, courses on Udemy are available on any device at any time. If you don’t have an internet connection, some instructors also let their students download course lectures. That’s up to the instructor though, so make sure you get on their good side!
You may also like
- Best Parenting Skills Courses to Learn in March 2025
- Best Home Improvement Courses to Learn in March 2025
- Best Gardening Courses to Learn in March 2025
- Best Sewing And Knitting Courses to Learn in March 2025
- Best Interior Design Courses to Learn in March 2025
- Best Writing Courses Courses to Learn in March 2025
- Best Storytelling Courses to Learn in March 2025
- Best Creativity Workshops Courses to Learn in March 2025
- Best Resilience Training Courses to Learn in March 2025
- Best Emotional Intelligence Courses to Learn in March 2025
- Best Time Management Courses to Learn in March 2025
- Best Remote Work Strategies Courses to Learn in March 2025
- Best Freelancing Courses to Learn in March 2025
- Best E-commerce Strategies Courses to Learn in March 2025
- Best Personal Branding Courses to Learn in March 2025
- Best Stock Market Trading Courses to Learn in March 2025
- Best Real Estate Investing Courses to Learn in March 2025
- Best Financial Technology Courses to Learn in March 2025
- Best Agile Methodologies Courses to Learn in March 2025
- Best Project Management Courses to Learn in March 2025


